


Setting Trail Cameras for Predators
By: Scott Haugen
I often wonder how much easier my childhood trapping days would have been if I had access to cellular trail camera data. It could have saved me a lot of time and energy. Similarly, during my time in Alaska’s Arctic in the early 1990s, running a 200-mile wolf trapline would have been much easier with a trail camera that could handle the harsh weather conditions and capture images of the surrounding area. It would have been a reliable tool to help me track the wolves.
Fast forward to today, I now reside in the Pacific Northwest region, where the habitat is vast, densely forested, and brushy. Identifying predator signs in such an environment can be quite challenging. In the area where I usually go for predator hunting, it is difficult to know whether there is an animal around unless you use trail cameras. I am amazed by the vast amount of information that trail cameras reveal. At present, I have 62 trail cameras set up in the woods, and I keep them running throughout the year. The data that I gather from these cameras has been incredibly helpful in teaching me about predator behavior.
They serve as my eyes in the woods, and they remain active all the time.
Tips for Trail Camera Placements
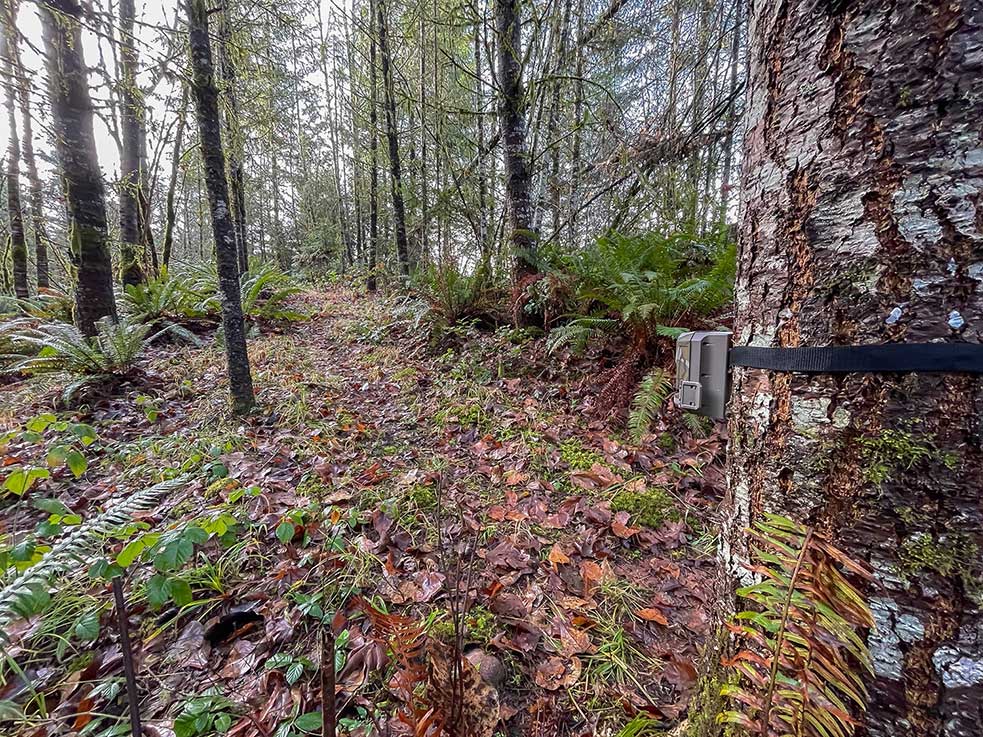
I often capture multiple predator species on a single trail camera. This is not a coincidence. On several trails, I have caught black bears, cougars, bobcats, gray foxes, and raccoons, along with the occasional red fox. If you want to capture a wide variety of predator species on camera, it’s important to consider their behavior. Large predators such as bears and cougars tend to frequent big game trails, which are also used by deer and elk. Additionally, other predators may use these trails, so it’s a good idea to place your trail cameras at convergence points or on primary trails. Old logging roads and farm roads are also great spots for trail cameras as they offer easy paths of travel for predators.
If you’re trying to capture images of coyotes using trail cameras, it’s best to place them along the borders of forests and areas with dense brush. These areas are ideal for coyotes as they offer easy travel and are typically abundant with food sources such as rodents and rabbits. Additionally, you may also capture images of bobcats and gray foxes in these locations.
If you want to capture foxes, it’s recommended to set up cameras in areas where habitats open up, particularly in the transition zones between coniferous and deciduous forests. These areas are ideal for capturing both gray and red foxes. Gray foxes tend to stick to brush, while red foxes prefer more open habitats. Red foxes are commonly found cruising riverbanks, while gray foxes are more likely to stick to creeks within brushy habitats. If you’re trying to catch red foxes, you may find them mousing on the edge of farm fields, while gray foxes are often spotted pulling nightcrawlers from game trails in the forest.
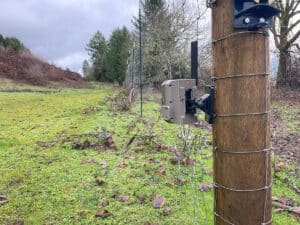
Planning to hunt or trap in lowland habitats such as river bottoms and farmland? Setting your cameras up near fences can be very effective – positioning the cameras where multiple fences converge, on corners, and where gates remain open. Coyotes and foxes tend to travel along fence lines as they offer a direct path to their destination, and they quickly learn the shortcuts. They also know where trails are under fences and where gates are open. Knowing their direction of travel can help you plan efficient predator-calling setups. When it comes to setting up trail cameras along fence lines, I prefer to attach them directly to wooden fence posts. For this purpose, the EDGE SERIES FLEX MOUNT is the perfect option. It keeps the camera away from the post, and the two brackets with set screws allow you to adjust the camera at various angles, ensuring that you won’t miss any shots.
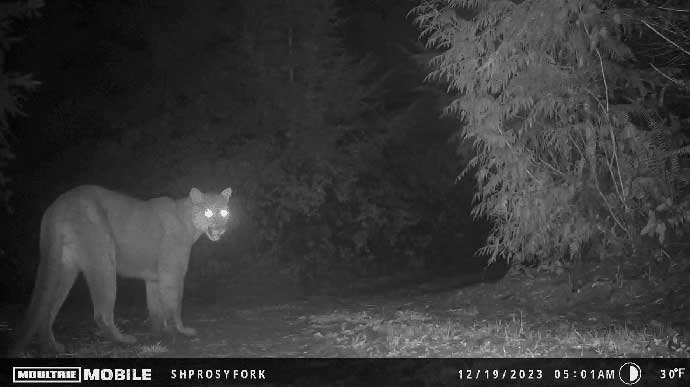
On trail sets, I like positioning trail cameras close to the ground to capture predators. I often strap them to rocks, bury them under logs that have fallen across a trail, and even secure them to chunks of wood I’ve pre-cut. This approach provides a unique and compelling up-close encounter rather than a distant capture of a blurred animal on the move.
I prefer to run all my trail cameras in video mode rather than taking still photos. This is because a 15-second video can reveal more than a still image ever will. I have found that many times, I have caught a single coyote moving into the frame, but by the end of the clip, multiple coyotes have appeared. I have also captured numerous gray foxes moving in pairs, raccoons moving as a family unit, and bobcats taking several minutes to move in and out of frame as they hunt. While a still photo captures only a single moment, a video clip can provide valuable insight into predator behaviors.”
When you’re setting trail cameras to monitor predators near the ground, make sure you position them facing directly into a trail. This will ensure that any approaching predator is instantly captured in the frame. If you position the camera facing perpendicular to the trail, the predator will often move through too quickly, and you’ll miss the shot. Before setting up the camera, trim all tall grass, vines, and other brushes that might blow in the wind and trigger the camera. If you’re using an EDGE PRO, the False Trigger Elimination will alleviate this problem without needing to trim the area.
If you are a fur trapper, it is recommended to place trail cameras along creeks and on trails that lead in and out of the water. You can position the trail cameras in the water, close to the water level, and on narrow peninsulas by attaching the camera to a Moultrie Universal Camera Stake. This setup will allow you to capture photos of beaver, otter, mink, raccoon, and nutria in water habitats.
Level Up with Trail Camera Accessories
If you are serious about learning all you can about predators in your hunting area, it is recommended to run cameras throughout the year. This will enable you to identify their seasonal paths of travel and food sources, which will ultimately increase your chances of success when it comes to hunting or trapping them.
To capture the activity of all these animals, I use Moultrie Mobile EDGE PRO trail cameras, a solar panel, and a RECHARGEABLE BATTERY PACK. During the winter, when there is little sunlight, a 10W UNIVERSAL SOLAR POWER PACK is ideal for getting brief glimpses of sunlight penetrating the foliage. In the summer months, when more sunlight is available, I switch to a 3.4W UNIVERSAL SOLAR POWER PACK to provide a charge.
Note: Scott Haugen is a full-time freelance author & photographer of 24 years. Follow his adventures on Instagram & Facebook

Featured
Juicy homemade jalapeno cheddar brats are perfect for grilling all summer long. They’re packed with all the right seasonings and fresh ingredients, making them extra tasty.

Featured
MeatEater and Moultrie Mobile join teams to bring hunters closer to nature.

Featured
These wild turkey skewers are tender and smothered in a homemade teriyaki glaze. Wild turkey sometimes gets a bad reputation for being a tough meat but when prepared properly using the steps in this recipe, the results are amazing.